When I lived in Manitowoc Wisconsin I met an artist, Cindy Shaw, who was a master Scherenschnitte designer and artist. The easier name for this craft is simply “Paper cutting”. Shaw’s designs were intricate and incredibly beautiful.
When I wondered how to do these beautiful designs, Shaw taught me her secret, use a utility knife. The X acto knife is perfect, and even the biggest klutz can, with care, produce beautiful results.

The under an hour fast craft… that looks great even the first time you try it.
Fast forward many years later and I’m living in New Hampshire. I’m often asked to provide a craft or art piece for local charities. This year I’m pretty busy just dealing with my arthritis.
What is an artist to do? My “go to- no time- still looks great” back up is scherenschnitte.
How simple and easy? First go to google and look for a silhouette design. Dover books also publishes simple paper cutting designs. Then find an old book. I keep damaged old books on hand that I feel will look good cut into designs. It is best to go with a very simple design as the paper can be very fragile.
Next, find the right frame. I’ve used dollar frames with easy pop in glass. If you go with simple, you are going to do better. I then carefully adjust the silhouette design I want to use on my computer until it is the right size to fit in the frame I wish to use. I often trace the design right from my computer screen, though you can also print it out.
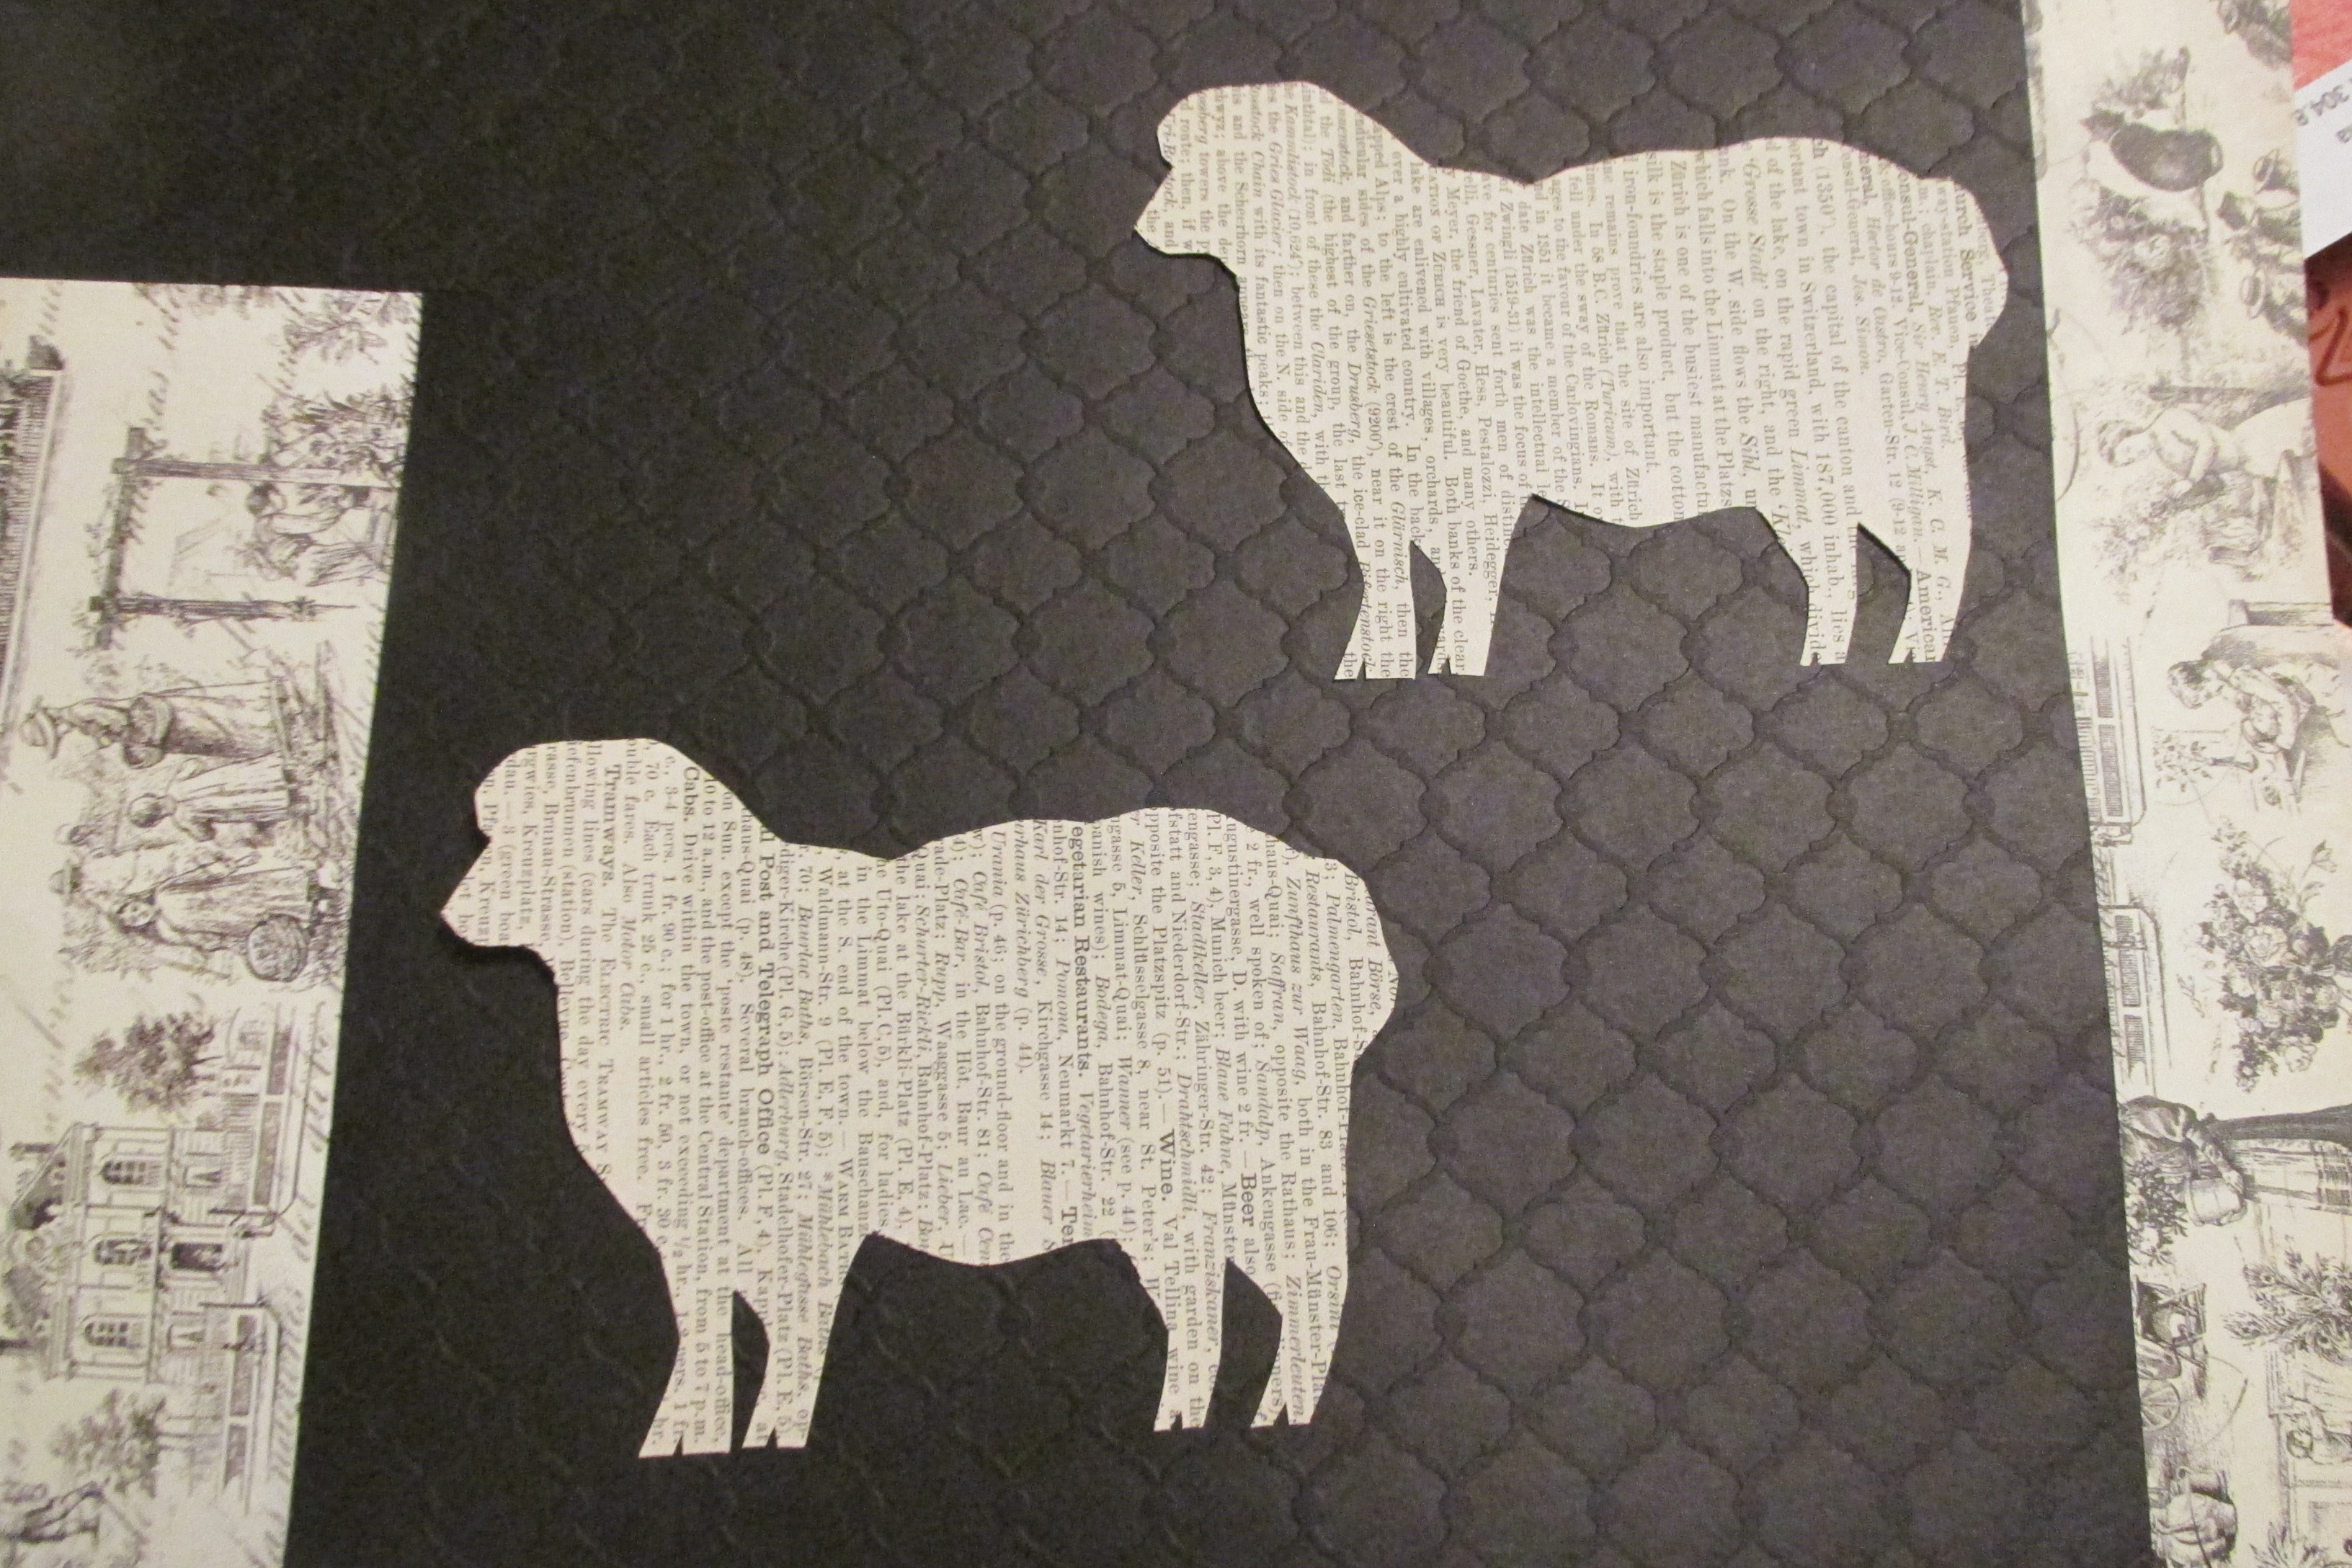
Contrast, contrast, contrast
Tape the design to the book page you wish to use, I had to turn the pages I wished you used sideways to make the design fit. I like the old tourist guide book I used as the words are written in very small print. I also like to use books written in French.

the design should be the focus. Make the design fit the size of your frame also.
Next using an X acto knife with a good blade cut out your design. If you are good with scissors you can also use a small pair. The important thing is to over cut if needed at corners, as it looks better than a small hanging bit of paper. You can always refine and resnip if needed.
A little glue or tape and you can put your design down on a black or other background that reads as a solid. The important thing here is the book and design really pop. Remember, what may look fine close up can be a muddled mess from a distance. I find a solid darker background makes the design read well. Black, and a darker frame, keeps the focus on the animal or whatever design you have chosen.
A busy background will lose the effect from a distance. So before you frame your design, be sure to view it from a distance. Remember, it’s only paper, and it only takes a few minutes to cut out a simple design. If you don’t like it, do it again!
When attaching your design also remember, not ever bit needs to be glued or taped. A few bits of tape in the middle works well, as when the design is in the fame it will be flattened. You don’t want glue or tape sneaking out over the edges. This is a case of “less is more”.
I’ve done detailed designs with many animals placed together in a larger frame, and the most simple as shown here. Frames can be bought on sale, the black ones used here were under $3 each. I’m not so happy with the silver frame but I had it on hand so it was basically free.
These will be donated to all those small groups that ask for something, and I imagine will probably go for around $20 to $25. Larger group paper cuttings of course go for more. The best part is most of us can easily find a beat up old book, and standard frames can also be found cheaply. Skill level here is “anyone can have a great result the first time!”
Enjoy! Also great for inexpensive presents!
Share this:

Categories: crafts

Nice!
Brilliant! Now I can add something else to my crafts resume!
Those look great!